23 May 2012

wedding DIY: sign posts tutorial

This is going to be a two-part post: the second post will crop up in June when I have a chance to photograph these bad boys in action at wedding set-up!  :)

'Til then, here's a DIY tutorial to whet your whistle and get those creative juices flowing for making cottage-chic signage at your wedding reception!


This wedding's colors are magenta, white, and black, so black and white for the signs just made sense.  We could have incorporated some magenta (in either the sequins or the lettering paint) but I think it was a good (more elegant) decision to keep the signs simple with just black and white.

Step 1: pick up some pre-cut two-by-fours OR borrow a wood saw from your fiance's dad (which is what this bride, my good friend Jennifer, did).  If you want arrows you'll have to cut them yourself.

Step 2: use white paint to paint the signs; we used regular ol' Behr home interior/exterior flat (matte) paint from Home Depot.  You could use whichever color you like, but I recommend a lighter shade, unless you'll be using white for the lettering (then you can go as dark as you want for the base).


Step 3: hot glue strips of black (or your choice of color) sequins to the edges of wood planks.  We used sequin trim from Jo-Ann's: Wrights Trim Single Sequin 24-yard reel in black.

Step 4: use a pencil to write the text for the signs.  I STRONGLY recommend using pencil first as a guide when you're ready to paint.  This way, if your lettering is too large, small, or unevenly spaced, it's easy to erase and redo.


Step 5: start painting!  I used (again) Behr interior/exterior flat home paint in one of those color sample "tester" sizes you can get from Home Depot.  This was MORE than enough paint to use on all the signs.  I also used cheap paintbrushes we bought in a pack of four from Jo-Ann's.  I actually recommend splurging just a smidge more on brushes if you can; cheap brushes burn out pretty quickly and the bristles kept coming out.  This is especially important if you have a lot of signs and aren't going to do all the painting in one sitting (which is what I did).


This might be obvious, but for thinner lettering, use a thinner brush!  Because my smallest brush was a little thicker than my pencil lettering, the end result was (again, perhaps obviously) thicker lettering.  Even more so because I did a second coat of paint to get the blackest black.  The results were great, but if you're using cursive lettering or want a very thin line, you'll want to get thinner brushes.

This was after the first coat.  With a second coat, the lettering was just a tad thicker than this.

I do recommend waiting for the first coat of paint to dry before going into your second coat, but if you're in a rush it's not 100% necessary.

And that's IT!  Easy, right?  It was a great, inexpensive DIY idea the bride had for directing her guests at a backyard reception.  I helped her create signage for the wine and beer/cocktail bars, restrooms, parking (and no parking), dance floor, a S'mores station (yum!), cards and gifts areas, and seating for the bride and groom.


I'm pretty happy with the way they turned out, and (more importantly) so is she!

If you're too lazy to make yourself (hey. no judgment here -- I'm often too lazy to try DIY projects myself) you can check out shops on Etsy (like this one or this one) for custom rustic wedding signage!

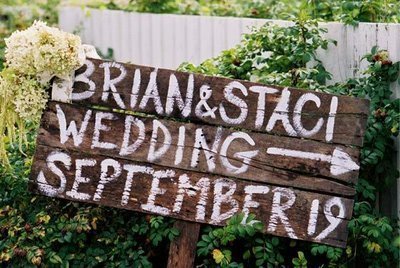
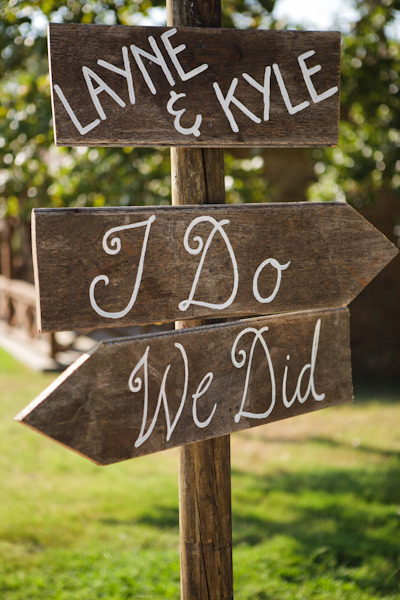
More wedding signage ideas (this first one is pretty similar, no?);


 {source}

{source}

 {source}

Check out our signs in action here!


22 May 2012

PINspiration: Hello, my name is GORGEOUS

Despite being doused with good portions of controversy over terms of use, I remain an avid Pinterest addict.  The ability to collect and share images, tutorials, and ideas that inspire me is just too compelling to resist.

This week, I wanted to share with you my "Hello, my name is GORGEOUS" pin board!  In loosely-defined terms, this embodies the "all things lovely" portion of {the Anna Delores blog}'s identity.  This pin board gathers everything from beautiful people to colors that inspire.  Enjoy a peek at this ever-growing collection!

Left to right, top to bottom: 1. Love the color, love the dress, love the staircase! | 2. Christina Hendricks: serious girl crush. 
3. I want to eat breakfast here every morning. | 4. Zooey Deschanel. Enough said. | 5. I want to live here! | 6. Good morning, Montmartre 
7. Laura Mazurek of Roots & Feathers. | 8. James Franco with a Rolleiflex.

More PINspiration:

21 May 2012

mani monday: the accent nail v.2

Okay, so I *may* be playing favorites here, but as I mentioned in last week's post, this is totally one my favorite looks!

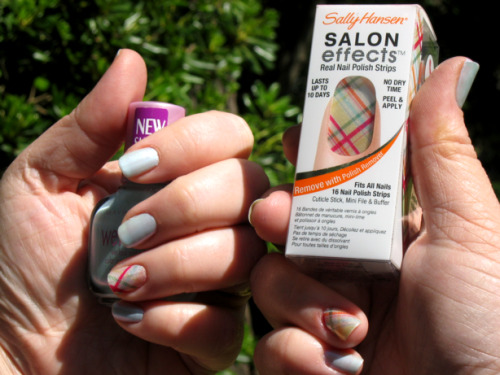
The accent nail is easy and it's so fun to play with different ideas and combinations!  This week I again used Sally Hansen Salon Effects Nail Polish Strips, this time in a different pattern (and definitely not pastel like last week!).

I would also like to acknowledge that it looks like I used Photoshop to edit my ring finger in this photo, and I SWEAR I didn't!  The photo just (very oddly) turned out that way!

  It kinda looks like I used Photoshop to edit the polish on my ring finger in this photo, and I promise I didn't!  :)


Here's what I used:

♥ Sally Hansen Insta-Dri Fast Dry Nail Color in Night Flight {buy it at Ulta}
♥ Sally Hansen Salon Effects Nail Polish Strips in "Love Letter" {buy it at Ulta}
♥ Sally Hansen No-Chip Acrylic Top Coat {buy it at Ulta}

Side note: Ulta is offering a coupon for 20% off item of your choice now through May 26!  Get it, girl!

The Sally Hansen polish strips (OPI and Butter London make them now, too, and I'm sure more brands will follow suit) are pretty easy to apply, but kind of hard to take off (I used regular polish remover but it took almost twice as long to remove the strip as it did normal polish).

I also used fake nails for this manicure!  It was a nail-biting week at work and my natural nails were just too short and pathetic to work with, so I opted for Kiss artificial nails (I have this set of 100 and trimmed and filed them down to my desired length and shape).  Did I fool you?  Or not really?  :)

I'm not sure I'd like the "love letters" on all five fingers -- seems a little much for me.  I like the patterned strips much better as an accent.  Yay!


More accent nail ideas using Sally Hansen strips:

 I have this plaid pattern and just have yet to try it! {source}


Have you tried any accent nail ideas?  Share your links!  And remember to visit the other awesome Mani Monday bloggers!  Thanks to Heather at Glitter and Gloss & Heather at Just Love.ly Things for hosting!

Link party with Heather at Glitter and Gloss!
 

The Nail Files

18 May 2012

four things Friday from Much Love, Illy

First and foremost, many thanks to Ilene over at Much Love, Illy for allowing me to share her thoughts and musings with y'all today.  I related to them so much that I thought my blog friends might get something out of it all, as well.  Confession: Illy didn't list them as "four things," but her points did break down nicely into four things (well, eight things...), so there.  :)


Enough from me... enjoy this mini guest post from Ilene!


"I have always, essentially, been waiting. Waiting to become something else, waiting to be that person I always thought I was on the verge of becoming, waiting for that life I thought I would have. In my head, I was always one step away. In high school, I was biding my time until I could become the college version of myself, the one my mind could see so clearly. In college, the post-college “adult” person was always looming in front of me, smarter, stronger, more organized. Then the married person, then the person I’d become when we have kids. For twenty years, literally, I have waited to become the thin version of myself, because that’s when life will really begin. And through all that waiting, here I am. My life is passing, day by day, and I am waiting for it to start. I am waiting for that time, that person, that event when my life will finally begin."
- Cold Tangerines by Shauna Niequist

The thought behind this quote has come across my mind more than a few times the past couple of months. Life seems to be one long waiting line sometimes, doesn't it? If you aren't waiting for one thing, you are waiting for another. And then life goes by so quickly--and then what ...?

Lately, I have really wanted to make it a goal to savor each day--not to worry about tomorrow. Not to freak out over the upcoming week. But to really savor the day that I have been given - and that I savor the time with my family, friends or whoever i may come into contact with. and that might even mean ... {four things}:
  1. turning the phone on silent
  2. switching the TV off
  3. putting aside that magazine
  4. delaying a blog post

... and instead savoring that moment in life by ... {four things}:
  1. making a Sonic Run with the sister
  2. drinking my morning coffee with Mom
  3. stopping to smell the roses (not literally though since it causes allergies for moi) 
  4. putting that to-do list down and blasting the music to dance in the kitchen.

This is not easy for me, especially since I'm a planner. But I'm trying.

much love,
illy

Thanks again for the share, Illy!  Here's to savoring a wonderful weekend. ♥

17 May 2012

At Home: guest post from Laura of Roots & Feathers

Hi, I'm Laura from Roots and Feathers.  I'd love to share a bit of my personal style in my home.

Emily has been a lovely fan of my work, and I'm honored to share in her space today.  She has selected a few of her favorite pics of mine that I have posted on my blog.

We just came up on our first year mark in our new home, and its been so much fun constantly changing things around and creating my personal style in my space.  In my opinion, as long as you decorate with things you truly love, it doesn't matter if it matches.  If you love it, use it.  I also try to mainly keep sentimental things and not just a lot of random meaningless stuff.

I hope you enjoy a peek into my home!

Lovely Laura at home with Violet and Bella


A gorgeous engagement photo of Laura and her hubby, James (in a custom frame from her father) is the focal point of the mantle.

Laura has said this owl wall hanging is one of her favorite pieces.

A sweet little fort for Bella.

Awesome work space shelving and objects.


 Some Roots and Feathers.

{Emily here} :: As Laura mentioned in her intro, she surrounds herself with items she loves and that have some meaning for her.  I could not agree more and it's something I've been striving for in compromise with my boyfriend in our new(ish) place: there are items he loves to have around him that don't necessarily "match" the theme or decor that I had in mind, but they make him happy and that's what is most important.  In the end, we'll have a house we can both call "home."
Related Posts Plugin for WordPress, Blogger...