


'Til then, here's a DIY tutorial to whet your whistle and get those creative juices flowing for making cottage-chic signage at your wedding reception!

This wedding's colors are magenta, white, and black, so black and white for the signs just made sense. We could have incorporated some magenta (in either the sequins or the lettering paint) but I think it was a good (more elegant) decision to keep the signs simple with just black and white.
Step 1: pick up some pre-cut two-by-fours OR borrow a wood saw from your fiance's dad (which is what this bride, my good friend Jennifer, did). If you want arrows you'll have to cut them yourself.

Step 3: hot glue strips of black (or your choice of color) sequins to the edges of wood planks. We used sequin trim from Jo-Ann's: Wrights Trim Single Sequin 24-yard reel in black.
Step 4: use a pencil to write the text for the signs. I STRONGLY recommend using pencil first as a guide when you're ready to paint. This way, if your lettering is too large, small, or unevenly spaced, it's easy to erase and redo.

Step 5: start painting! I used (again) Behr interior/exterior flat home paint in one of those color sample "tester" sizes you can get from Home Depot. This was MORE than enough paint to use on all the signs. I also used cheap paintbrushes we bought in a pack of four from Jo-Ann's. I actually recommend splurging just a smidge more on brushes if you can; cheap brushes burn out pretty quickly and the bristles kept coming out. This is especially important if you have a lot of signs and aren't going to do all the painting in one sitting (which is what I did).

This might be obvious, but for thinner lettering, use a thinner brush! Because my smallest brush was a little thicker than my pencil lettering, the end result was (again, perhaps obviously) thicker lettering. Even more so because I did a second coat of paint to get the blackest black. The results were great, but if you're using cursive lettering or want a very thin line, you'll want to get thinner brushes.

This was after the first coat. With a second coat, the lettering was just a tad thicker than this.
I do recommend waiting for the first coat of paint to dry before going into your second coat, but if you're in a rush it's not 100% necessary.
And that's IT! Easy, right? It was a great, inexpensive DIY idea the bride had for directing her guests at a backyard reception. I helped her create signage for the wine and beer/cocktail bars, restrooms, parking (and no parking), dance floor, a S'mores station (yum!), cards and gifts areas, and seating for the bride and groom.

I'm pretty happy with the way they turned out, and (more importantly) so is she!
If you're too lazy to make yourself (hey. no judgment here -- I'm often too lazy to try DIY projects myself) you can check out shops on Etsy (like this one or this one) for custom rustic wedding signage!
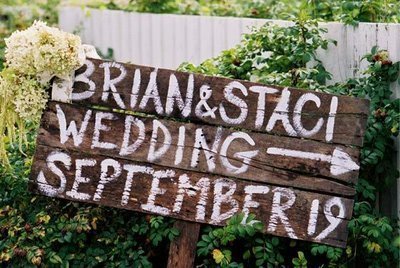
More wedding signage ideas (this first one is pretty similar, no?);

{source}

{source}

{source}

{source}


Check out our signs in action here!


I love the sequin touch to these Emily! And the handwriting is adorable. So cute!!
ReplyDeleteEvani
http://www.simplyevani.com
These signs are adorable!
ReplyDeletexo,
janmloves.blogspot.com
I'm having a giveaway on my blog if you're interested!
These are the cutest! I love them. They remind me of Alice in Wonderland's multicolored signs. They look perfect for a garden as well. Adds a touch of curiosity. :D
ReplyDeletehorsesofares.blogspot.com