


When I first saw this, I thought I'd need five different polishes in the same color family, just lighter and darker versions of each other. I knew I had enough polishes to make it happen (I think I have 15+ polishes just in pinks), but shades can vary so much -- some are warm tones, some are cool tones, some are shimmery, some are matte, etc. But THEN I realized (with the help of an In Style post): all you REALLY need is one dark polish and one white polish. See where I'm going with this?

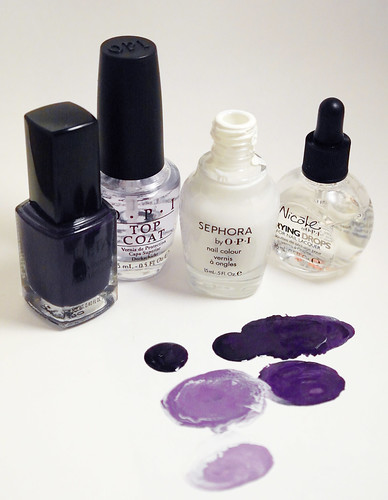
For my color inspiration, I decided on "Devious," a midnight purple shade in a creamy matte (no shimmer) that I got from Ulta. For white, I used Sephora by OPI in "A-ha! Moment," a bright opaque white.
What you'll need:
- Dark shade nail polish in your color of choice
- Creamy white nail polish
- Base coat + top coat (optional, but recommended)
- Drying drops (optional)
- Toothpicks or cuticle sticks for mixing
- Paper plate to use as your palette
Perhaps this is a no-brainer, but I recommend doing all your manicure prep before pouring and mixing colors, as once you measure out your polish, it (of course) starts to dry. Because I got excited and poured my polish before applying my base coat (Nicole by OPI Base Coat Plus), the polish was a little thick and had already started to harden when I was ready to apply. My end result wasn't as tidy as it should've been, since I was negotiating with half-dry polish. Gross.

Measure out four dollops of your dark polish (I originally did five because I was thinking, five fingers, right? But for the fifth one, you can use the original color out of the bottle, of course! Duh, Emily). Add drops of white to each, one at a time -- mix as you go so you can see if you need to go lighter or darker, and adjust the remaining "swatches" accordingly. I had to fuss with mine a little to get the right gradient of colors.
And voilà! You've got your ombre palette. You can start at whichever end you like (your pinkie or your thumb) -- I opted for starting dark on my pinkie and then working my way over, but you can do it the other direction, too, of course! It's up to you.
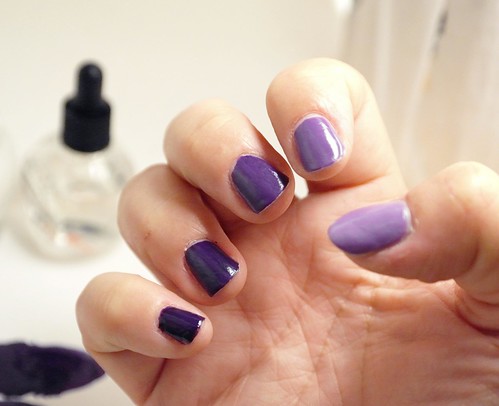
And that's it! I TOLD you it was easy-peasy. Finish with your favorite top coat and some lacquer-drying drops (just 1-2 drops per nail) -- I used OPI Top Coat and Nicole by OPI Drying Drops.
You can do this with pretty much any color as long as it's dark enough to begin with; the darker the shade, the greater your flexibility in making the gradient as dramatic as you like. I could've gone a lot lighter on my thumb color and thus had a more dramatic dark-to-light transition (as it is, the shades on my pinkie and ring finger look almost the same unless you're examining them in bright sunlight!). Still, I like the subtlety of a tame gradient. Experiment with the colors and make it your own!
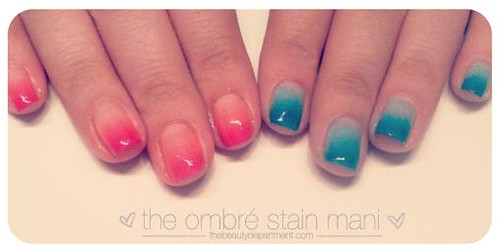
A few other color ideas to get you excited (don't you love that glitter? Courtesy of Lauren Conrad over at The Beauty Department):

And this is a whole other level (I think this is the true 2012 reincarnation of the ombre nail, but I'm just not ready yet; it will end up looking like this: "nailed it"):
Enjoy, and let me know if you try this out -- I want to see! :)
xo,
Emily


What a clever idea! :)
ReplyDeletexo,
Blanca
Love, love, love!!! Thank you SO much for linking up!
ReplyDeletexo,
Heather
Thanks for hosting, Heather! :)
DeleteI linked up today too. So much fun! I really want to try this, but can only imagine how bad I'll mess it up. Ha!
ReplyDeleteYou'd be surprised, I thought I'd really mess it up, too, but I did alright! :)
DeleteHere's my gradient look. It's messy while you do it, but awesome effect after a topcoat! (Visiting from Mani Monday!)
ReplyDeletehttp://www.beingspiffy.com/blog/gradient-nail-tutorial.html
I love it! So pretty! Visiting from Mani Monday!
ReplyDeleteHow did you apply the different shades of nail polish? Is this a dumb question? I feel like you couldn't use the nail polish brush because the colors would all blend together.
ReplyDeleteHi Katie, totally not a dumb question -- I just blotted the purple polish brush between each color. It DID get a *little* streaky (only because I'm so impatient so I didn't always blot thoroughly) and I think someone more resourceful and patient than I might suggest getting little paintbrushes for this (I guess you'd toss them after?). Even with blotting, you might get a little extra purple mixed in to each shade, but it doesn't change the color gradient much... hope that helps (and made sense). :)
DeleteCouldn't you just start with adding one drop of white at a time for each additional nail? 1st nail original color, 2nd nail add a drop of white, 3rd nail add another drop of white...... Saving nail polish!
ReplyDeleteHey M! You totally could, and that's actually how I started out but I quickly realized that one drop of white doesn't make a big difference, so you really need more white to make a dramatic-enough difference in the gradient. :)
DeleteI love how you made your own shades, it turned out so pretty! I really want to try the ombre stain but I haven't had the guts yet ;)
ReplyDeleteVery very very cleaver way to utilize one polish but still get the ombre effect. Love it!
ReplyDelete